


After a solid day of eating and watching the snow pack grow, I returned to the shed to attempt the first install of the landing stringer and a hull topside. Thoughts of skiing were of first order but I don't trust new snow over no base with a holiday crowd a yahoos urgently needing to rip up the slope. All in good time, no need to end the season short with an injury or worse. Not that I am a cautious tele-skier. I've just watch too many fools bite it in their first few days. Hey experience is worth something sometimes!
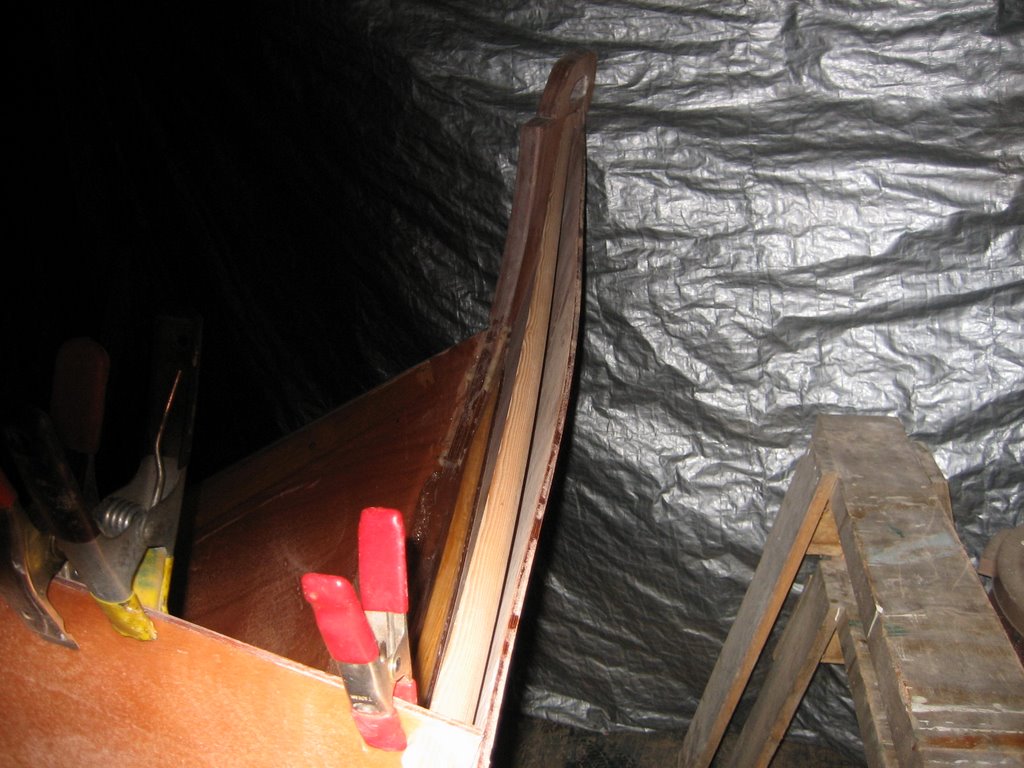
Thoughts back to work on the boat, I first drilled a hole in a scrap of 6mm plywood to see how close to the edge I could go with the one inch hole required for the stringer. I held it about 2mm from the edge. I drilled the holes at each bulkhead and after having faired the thirty foot long stringer fed it into place through he six bulkheads. Easier said than done but I eased it slowly into place with all the bulkheads holding and none of the holes blowing out. Once it was in place I tapped a short length of half round stock into the one side of the round hole with the flat side of the stringer at a 45 degree angle to the tangent of the hull side. Once in place I rolled the boat on its side on two saw horses, fitted the bow end of the stringer, screwed it in place and then lay the upper hull side strip along the one inch overlap line I'd previously drawn on the lower hull side. Once I had it properly lined up at the bow, I temporarily clamped it in place and then measured and marked screw hole locations. These I drilled with a tapered bit with a countersink attached. I use a Fuller countersink bit. I did these in groups of five, starting at the bow to ensure I didn't cause edge set. I continued with this until I reached bulkhead #1 at the stern. Here I stopped leaving the stern end of the stringer and hull side free. I resuspended the boat in the straps, removed the saw horses and lowered the boat back onto its cradle up[right. At this point a drilled a hole through the bulkhead near the top and two through the sides so that I could wire the bulkheads to the side. After completing this, I noticed that I had bent one of the bulkheads out of its vertical plane. I checked all the bulkheads with a straight edge, adjusted two and retightened the wires. After completing this, I noticed that the stringer needed to be further rotated. I drove the short half plugs out of their holes and rotated the stringer until it was right. In one place, I discovered I had inset it too far leaving a hard bend to its length. After re-driving the bulkhead plugs and by using clamps and a temporary exterior stringer I determined that I could get the upper edge of the hull side to lie in a fair and true curve though bulkhead #4 appears to have been cut too narrow at the top. This can be adjusted by loosening the wire slightly and allowing it not to lie tight against the hullside. I decided to call it quits for the day. With so many distractions around I decided not to go on as it would be easy to make a critical mistake at this point.
posted by tsunamichaser at 5:44 PM
![]()
![]()


1 Comments:
Hi Thomas,
Just wondering why you decided to run the stringer internally instead of external?
Just for looks?, or just to allow for your deck to hull modification?
Post a Comment
<< Home