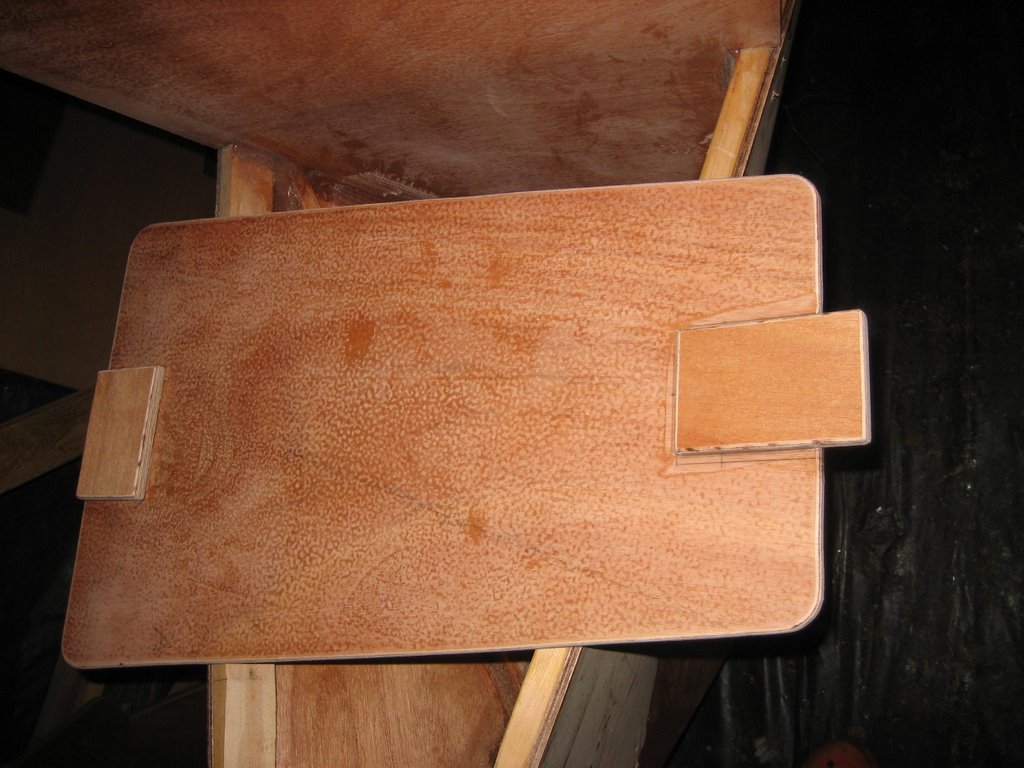


After I made all the hatch components, I dry fitted the pieces. I am using 15 mm plywood for the catch, latch and latch plate doublers and 6 mm plywood for the lip. The doublers are 2 3/4' X 4". On the plywood catch, I used a beltsander to sand a bevel on the backside of the plate. The bevel is 2" long and two plys thick. This cants the catch just enough that it won't bind. It is glued to the backside of the hatch with one inch protruding. The other doublers are mounted flush with their edges. The lip for the hatch is made of 1 1/2" strips of plywood scrap. They are fitted with tight butt joints which takes some doing as you need to get the angles and spacing right at the same time. To simplify aligning them with the edge of the hatch opening, I minimally kerfed (so a kerf is just visible - maybe 1/64") the strips so that I can align them with 3/8" exposed.
Once everything had been dryfitted and the lip components had gaps cut in them for the doublers and were temporarily taped together, I mixed up a batch of SystemThree Silvertip Gelmagic, put it in a ziplock bag and squeezed it out on the glue surfaces and fitted the pieces. I took the opportunity to fit the bunk ledgers at the same time. I like using wire to hold these pieces in place instead of screws as you can adjust the alignment. All the wire holes will be filled before I put cloth on the outside of the boat. I also gave the storage area under the bunk a final coat of epoxy which I brushed on, squeegee'd out and then backrolled. My plan is to only paint the inside of the boat from the bunk boards up, leaving the bilge clear coated.
posted by tsunamichaser at 9:16 PM
![]()
![]()


0 Comments:
Post a Comment
<< Home